Here at Detroit Labs we use Charles Proxy to debug and test our mobile applications. By recording and displaying the data sent and received by our mobile apps, we gain the visibility we need to reliably diagnose and fix problems and validate our work.
The first step to use any Charles feature is to make sure we are able to “listen” to the traffic from our app. We have two options: setting up our simulator/emulator or setting up our Device.
In this tutorial, we will explain the first option for iOS simulators. Want to learn more about both for Android and iOS? Check out our guide to Charles Proxy.
1) Reset your simulator to make sure you don’t have old or bad certificates.
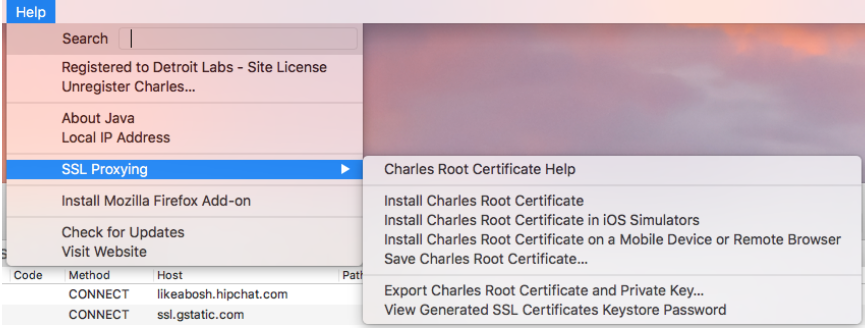
2) In Charles menu, go to: Help > SSL Proxying, and select Install Charles Root Certificate in iOS Simulators.

3) Restart your simulator
4) Make sure you are listening for traffic on your computer. Go to the menu Proxy > macOS Proxy.

5) In Charles, make sure you have SSL Proxying enabled for the URLs you want to examine. For that, go to the menu Proxy > SSL Proxying Settings and Add the URL you are interested in. You can use * to indicate a range of URLs.

6) Make sure to restart Charles after adding URLs in your SSL Proxying Settings.
7) If you haven’t already, click Start Recording in the top menu to start listening for traffic.

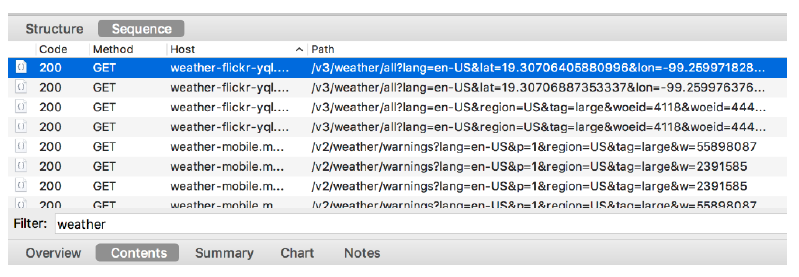
8) Run the app in the simulator. You should start seeing traffic! One way to confirm is by logging in to the app and searching for that particular network call. To make the search easier, you can add a filter in the Sequence view.

Want to learn more about both for Android and iOS? Check out our Guide to Charles Proxy.
Visit our guide to Charles Proxy