
If you’ve been using a Mac for a while, you likely have tons of tricks and shortcuts that you use every day to make your life easier. In an effort to share our knowledge, we’ve created a living list of Mac shortcuts to help you be more efficient.
Since we have so many of these, we’ve also added a table of contents so that you can simply click directly on the Mac shortcut you want to see instead of scrolling through a long webpage.
Finder: Preview
Applications: Cycle Through Windows
Text Editors: Using Emoji & Symbols
Document: Save as Location
Navigation: Tabbing Around
Terminal: Open Finder Here
Finder: Open Terminal Here
Spotlight: Quick Mac Wide Search
Display: Zoom In & Zoom Out
Finder: Path Bar
Xcode: Move Source Code Up/Down
Xcode: Run/Stop
Text Editors: Copy / Paste and Match Style
Finder: Expand All Subfolders
Finder: New Folder with Selection
Finder: Rename Multiple Files
Finder: Preview
You may already know that in Finder you can use the <strong>spacebar</strong> to open a preview of a file when have it highlighted. This allows you to preview an image without opening it. Press the escape key to dismiss the preview window.
What you may not know is that you can preview using the entire screen. Highlight one or more images and then press <strong>option+spacebar</strong>. You can navigate through each highlighted image by pressing the <strong>left arrow</strong> or <strong>right arrow</strong> keys.
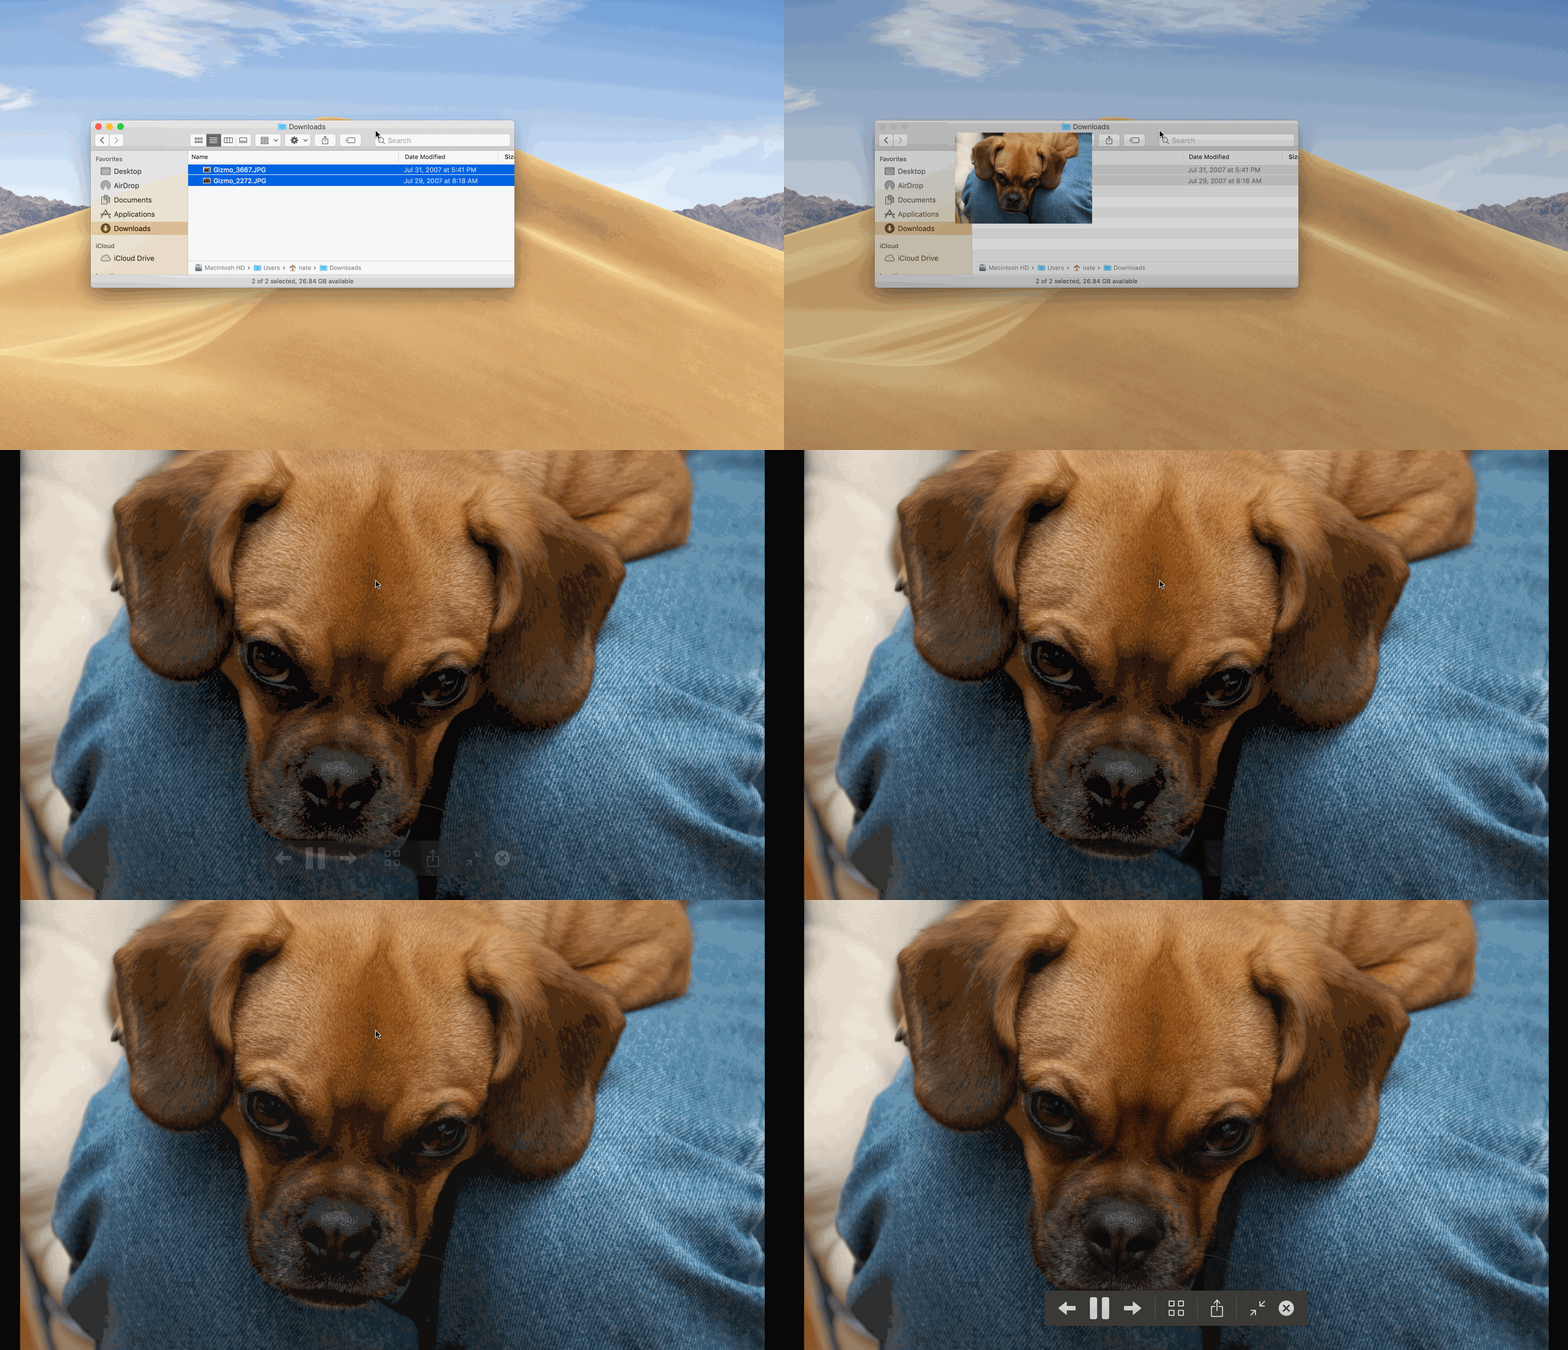
How about viewing two images side by side? Open Finder and highlight two images, and press <strong>option+spacebar</strong>. Next click on the <strong>Index Sheet</strong> button. You should now see both images next to each other. Press the <strong>escape</strong> key to dismiss the preview.

Why would you want to view two images side by side? Maybe you want to see how the additional real estate is used on a larger device. When designing an app, you may want to see what it looks like on an iPhone XS and on an iPhone XS Max.
Another use case is to compare changes you’ve made to a screen to what it looked liked before hand.
Applications: Cycle Through Windows
Most people probably know that you can use the command+tab keys to switch between applications, but did you know that you can switch between two different windows in the same application easily by pressing the <strong>command+backtick</strong> keys?
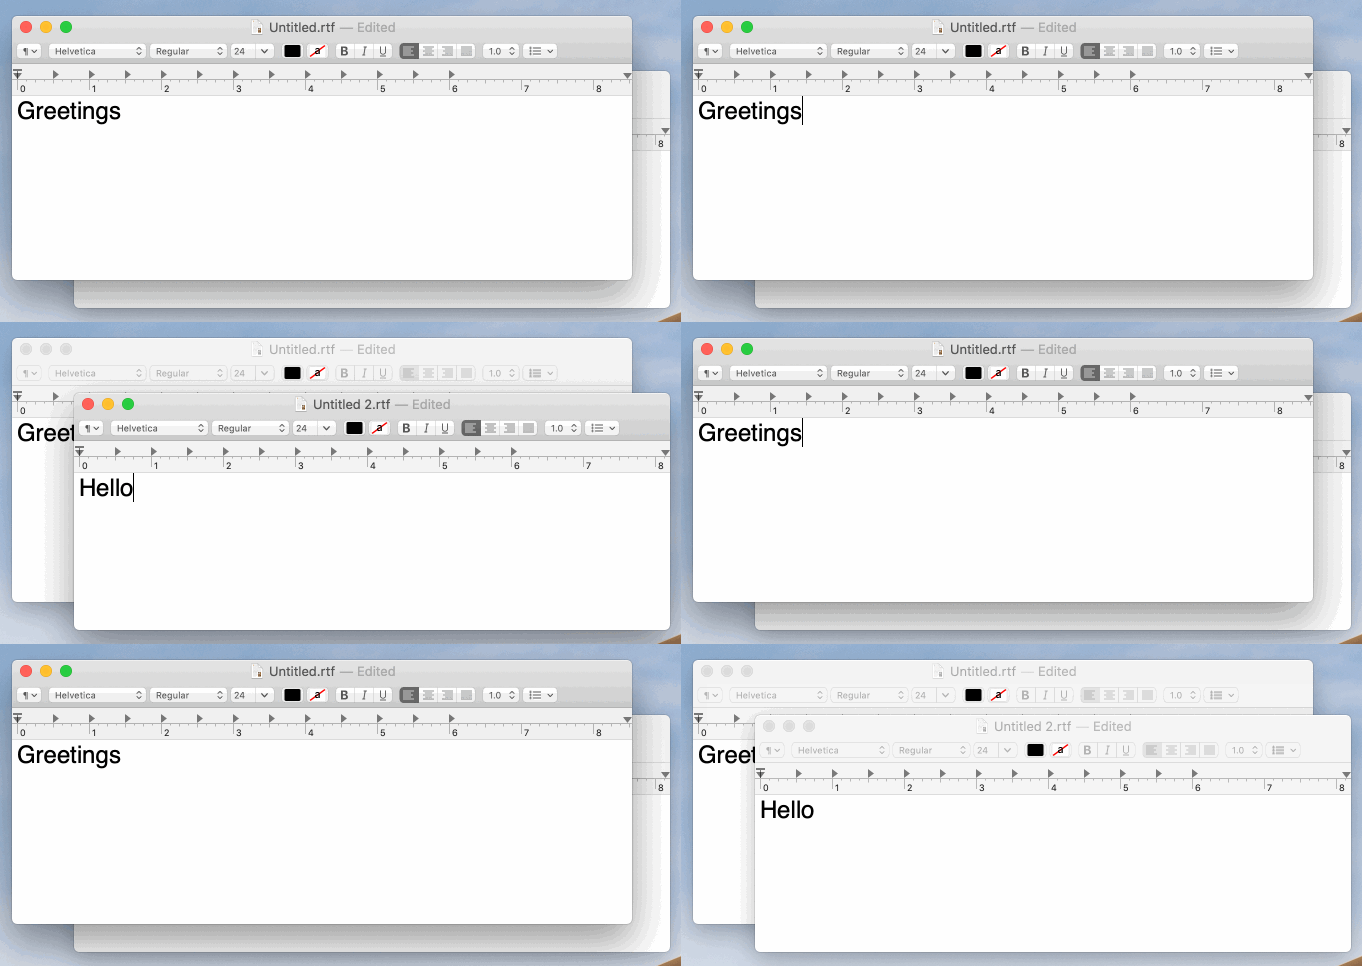
If you have multiple desktops, it will only switch between windows of the same application in the currently presented desktop.
Text Editors: Using Emoji & Symbols
When writing a document, you might want to have a few emoji or symbols. No problem. You can easy find and insert them. Press the <strong>control+command+spacebar</strong> keys.
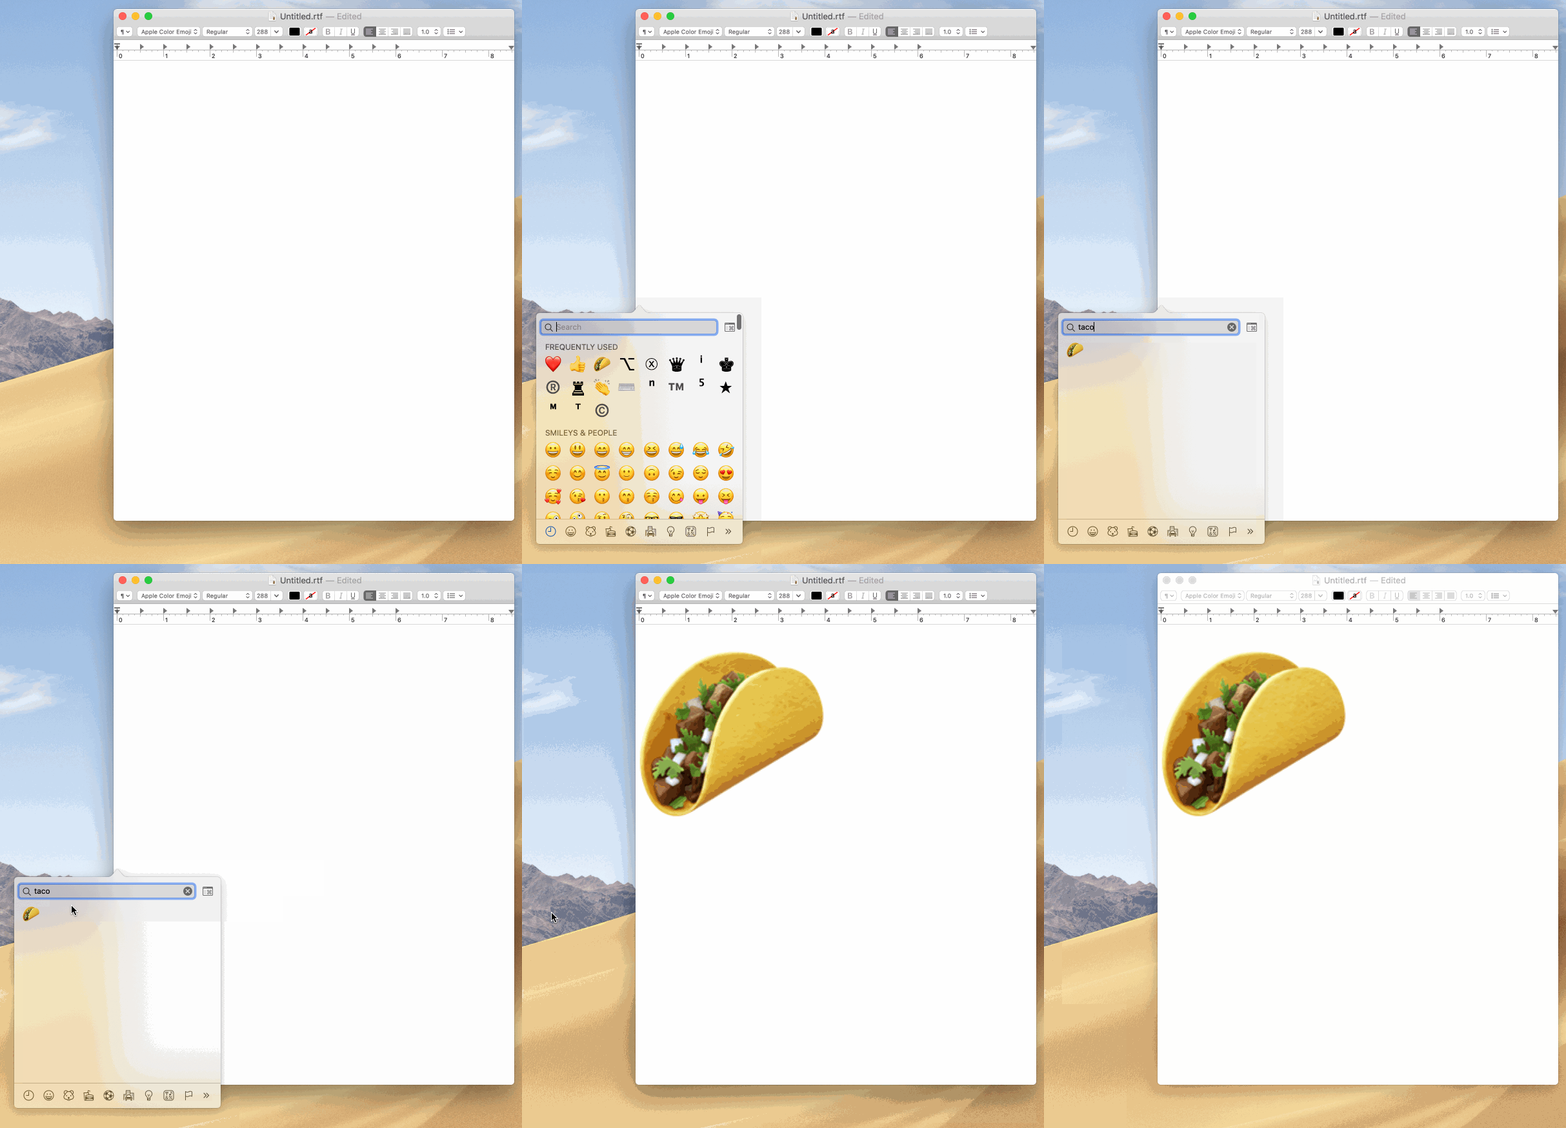
You will be presented with a popover dialog. Type in the name of what you are looking for. Here we want to add a delicious taco. A single click on the image is all that is necessary to activate Taco Tuesday.
Document: Save as Location
When you first try to save a document, you are presented with a save as dialog. The folder that it default to might not be where you want to place the document.

Here we’re saving our treasure locations to our secret notes folder. Just drag a folder to the save dialog window, and the save as dialog will now use that as the working folder.
Navigation: Tabbing Around
When a dialog is presented you might want to tab between buttons. By default, Mac won’t allow you to do this, but this Mac shortcut can be enabled. For those that have used Windows, this behavior should be quite familiar.
When disabled, you’ll see the <strong>Empty Trash</strong> button is highlighted. Pressing the <strong>enter</strong> key, will select the default option. To press the <strong>Cancel</strong> button, you need to either press the <strong>escape</strong> key, or use the trackpad to tap the <strong>Cancel</strong> button.
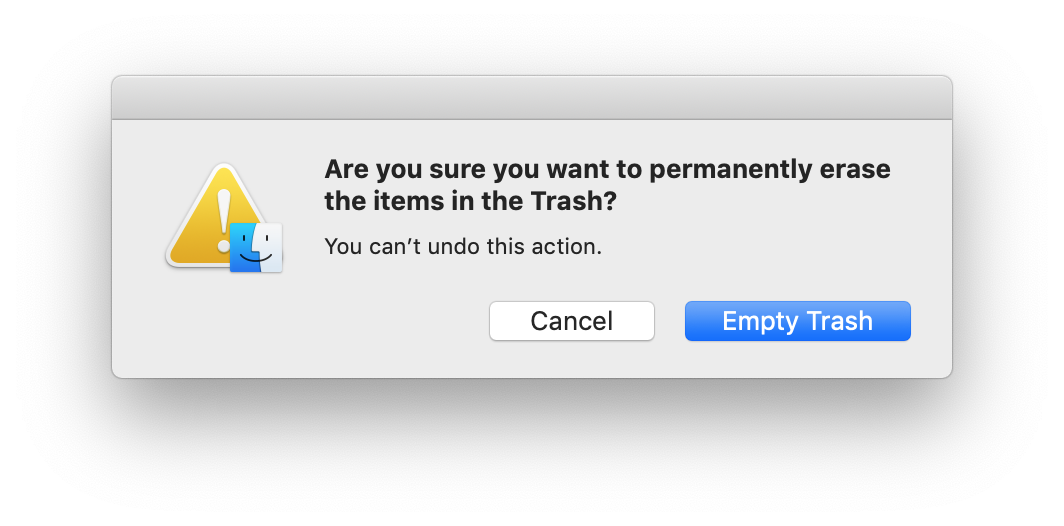
Let’s enable tabbing. Open <strong>System Preferences</strong>, then <strong>Keyboard</strong>, select the <strong>Shortcuts</strong>. In the lower left, you’ll see two options. Select the <strong>All</strong> <strong>controls</strong>.
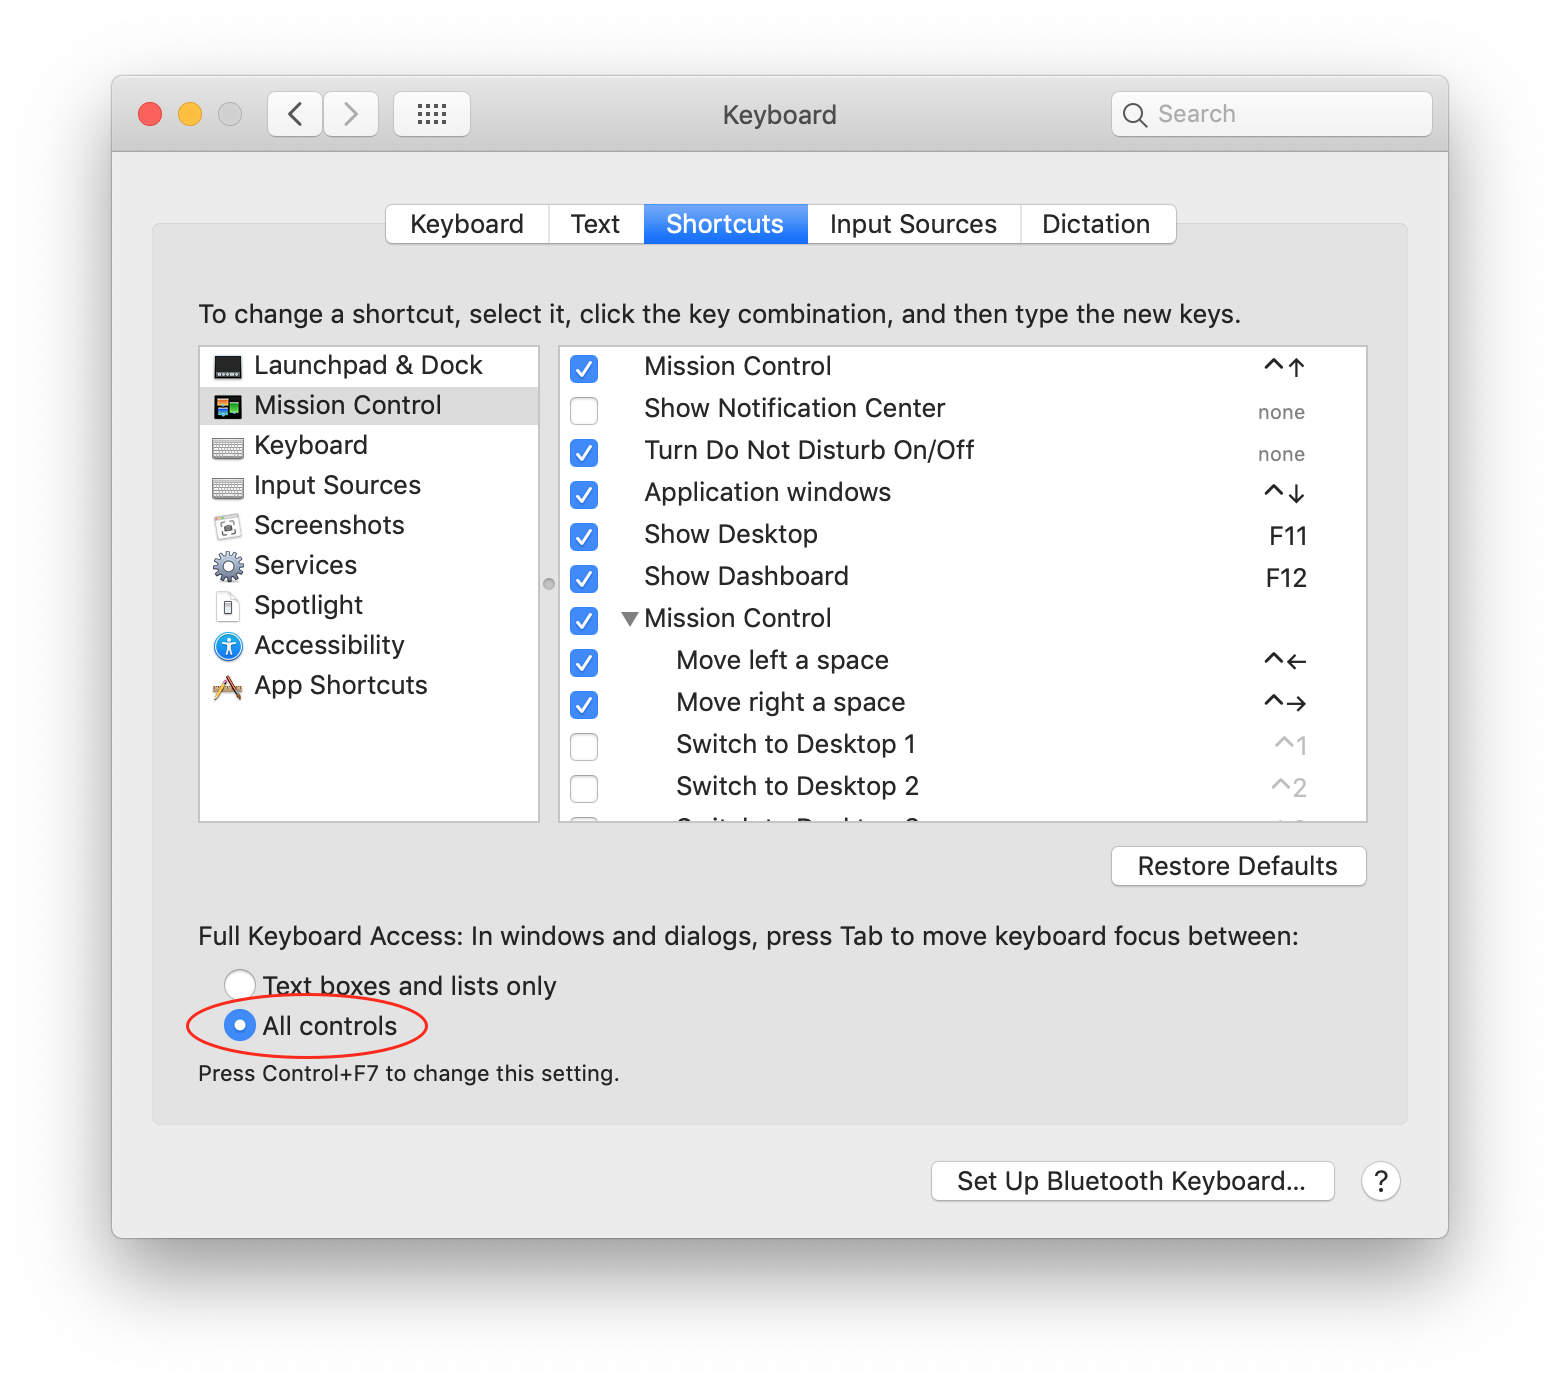
Here you’ll see the difference with the previous dialog. You can tab between buttons. To select the highlighted button, tap the <strong>spacebar</strong> key.

Terminal: Open Finder Here
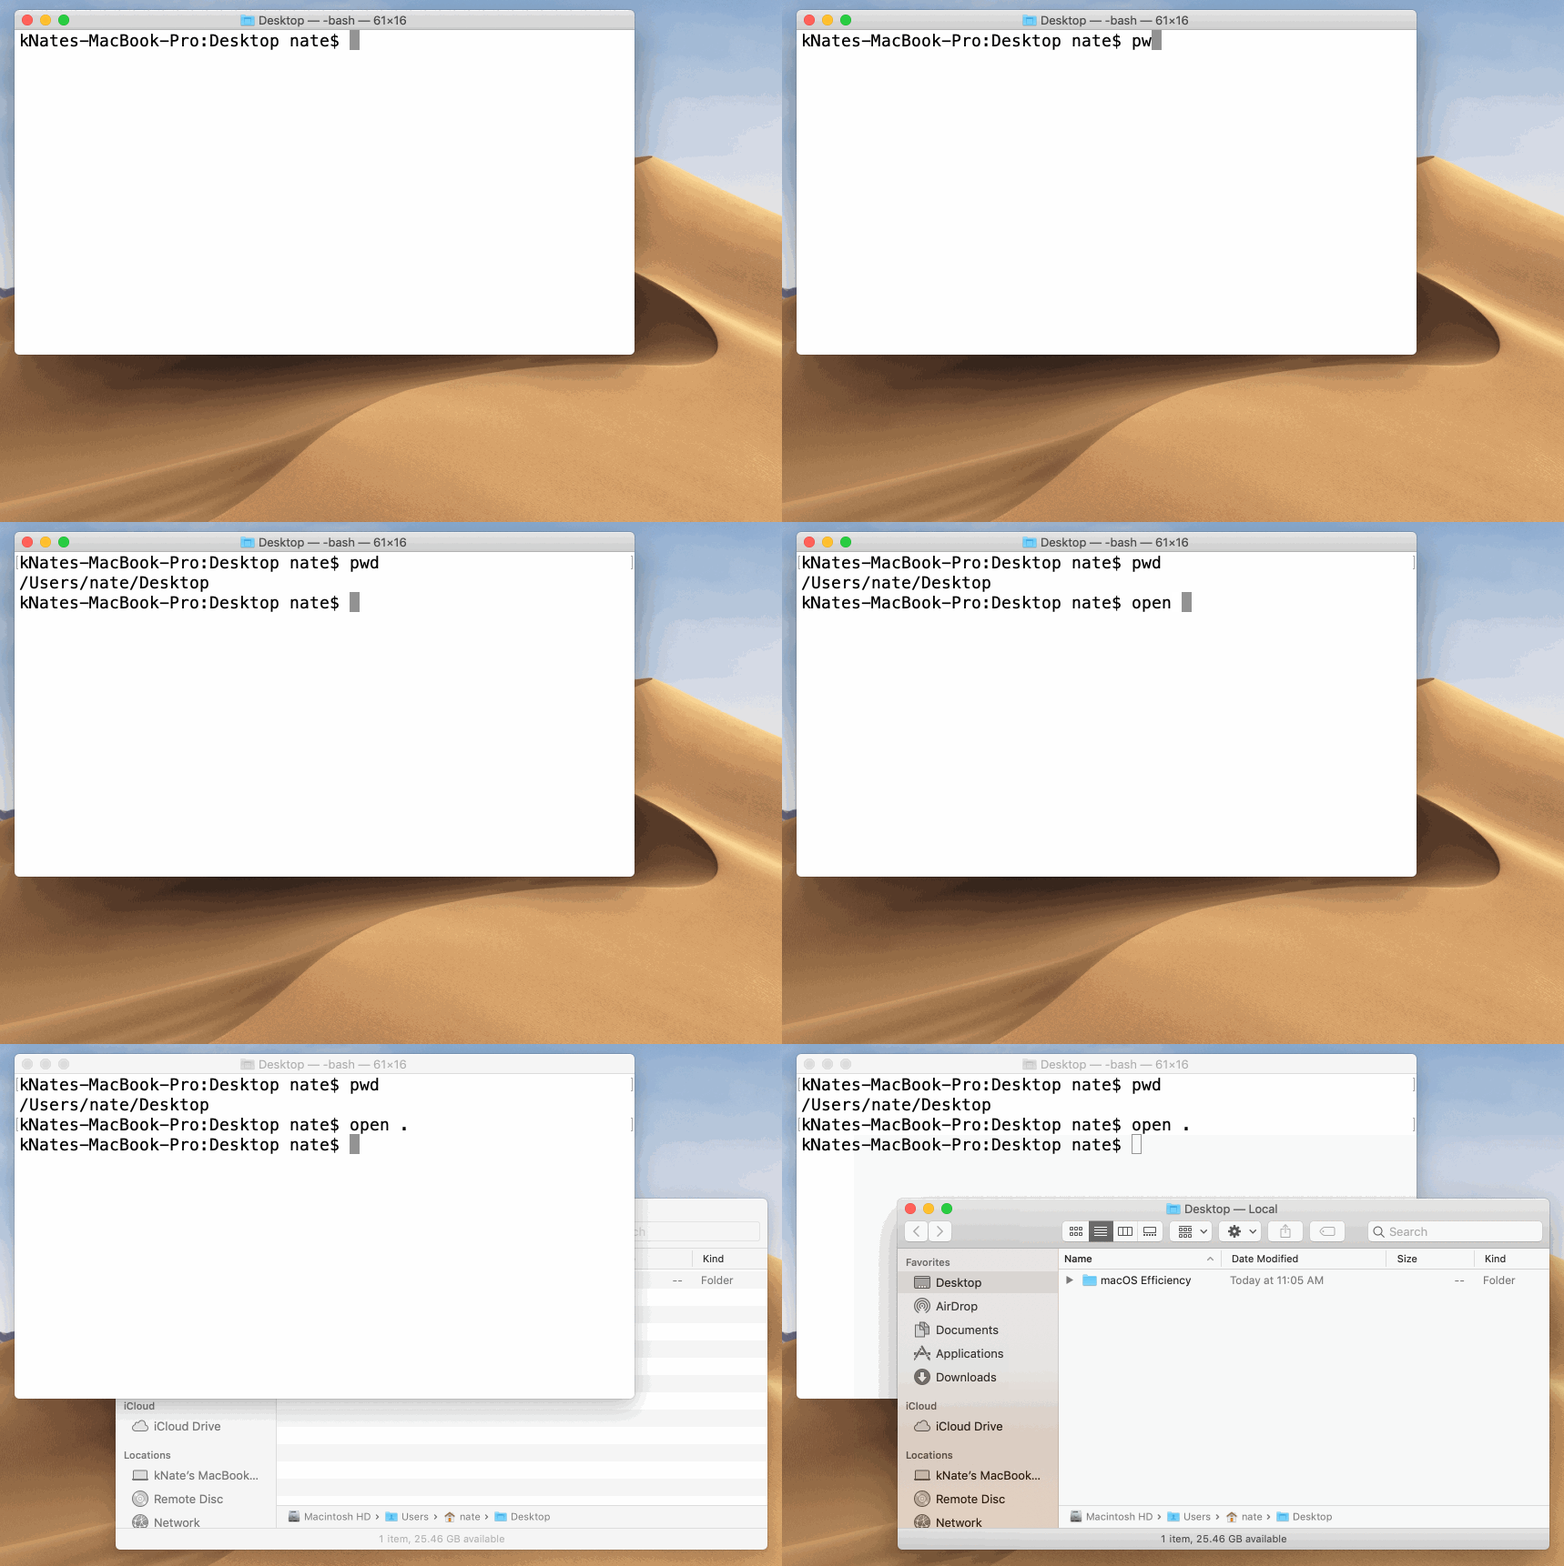
If you find yourself working in a terminal and you want to open the current directory in Finder, type <strong>open .</strong> and press enter. This also works if you want to open the previous directory <strong>open ..</strong> and press enter.
Finder: Open Terminal Here
Quite often we find ourselves browsing around in finder, only to later need to open a terminal window. Here we’ve navigated to our <strong>Desktop</strong>. We have a folder called <strong>Secret Notes</strong>. We’re going to highlight that folder, and tap <strong>command+period</strong> and a new terminal opens.

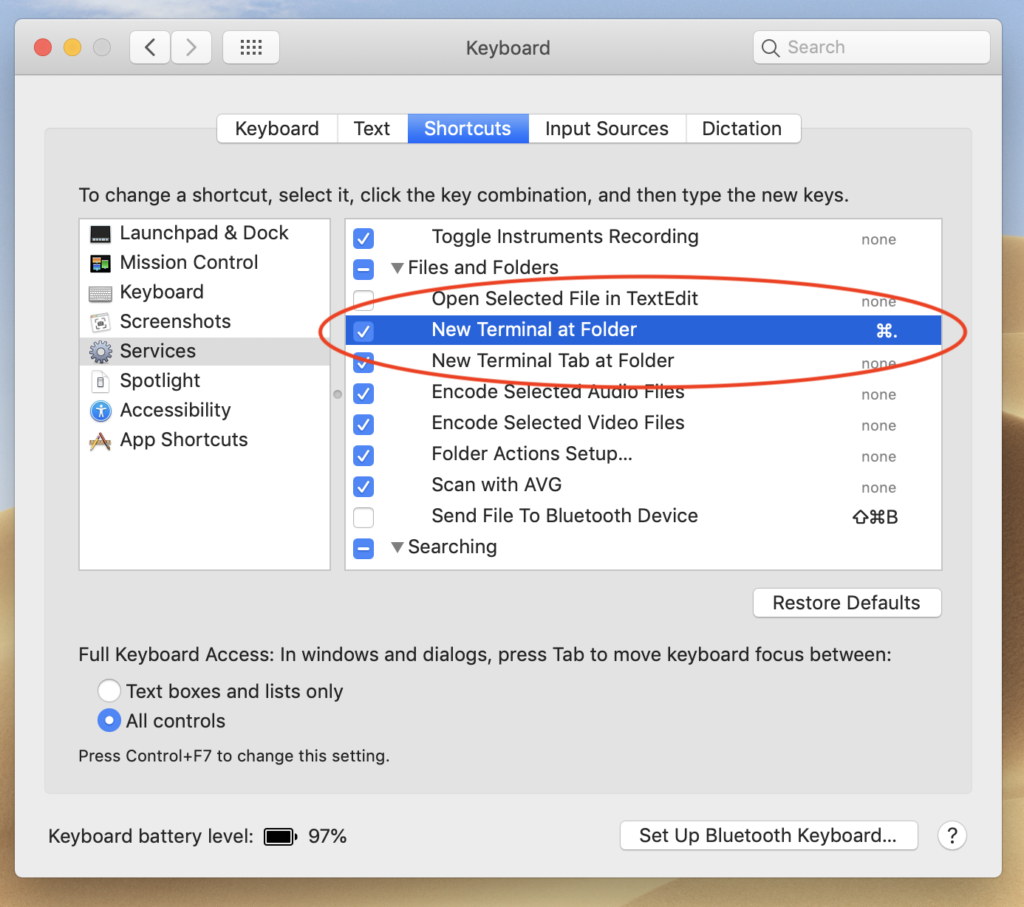
Let’s enable this feature. Open <strong>System Preferences</strong>, then Keyboard, select the <strong>Shortcuts</strong> tab. On the left, select <strong>Services</strong>. Then on the right, scroll down to <strong>Files and Folders</strong>. Enable <strong>New Terminal at Folder</strong>. You’ll need to enter your own key combination. We use <strong>command+period</strong>.
Spotlight: Quick Mac-wide Search
Here we’re tapping <strong>command+space</strong>. A search bar appears, and we can type in term which will search the Mac. The first result is what we’re looking for, as we’d like to open the Terminal App. Only one more step to take, pressing the <strong>Enter</strong> key to open it.

This can be used to quickly open apps. Or if you type in the name of a document, it will return a list of documents with that name. You can highlight one of the results, and press <strong>Enter</strong> to open it.
Display: Zoom In & Zoom Out
When giving a presentation, there are times when you’d like to focus on a specific part of the screen. This Mac shortcut also enlarges the screen content, making it easier for everyone to see.
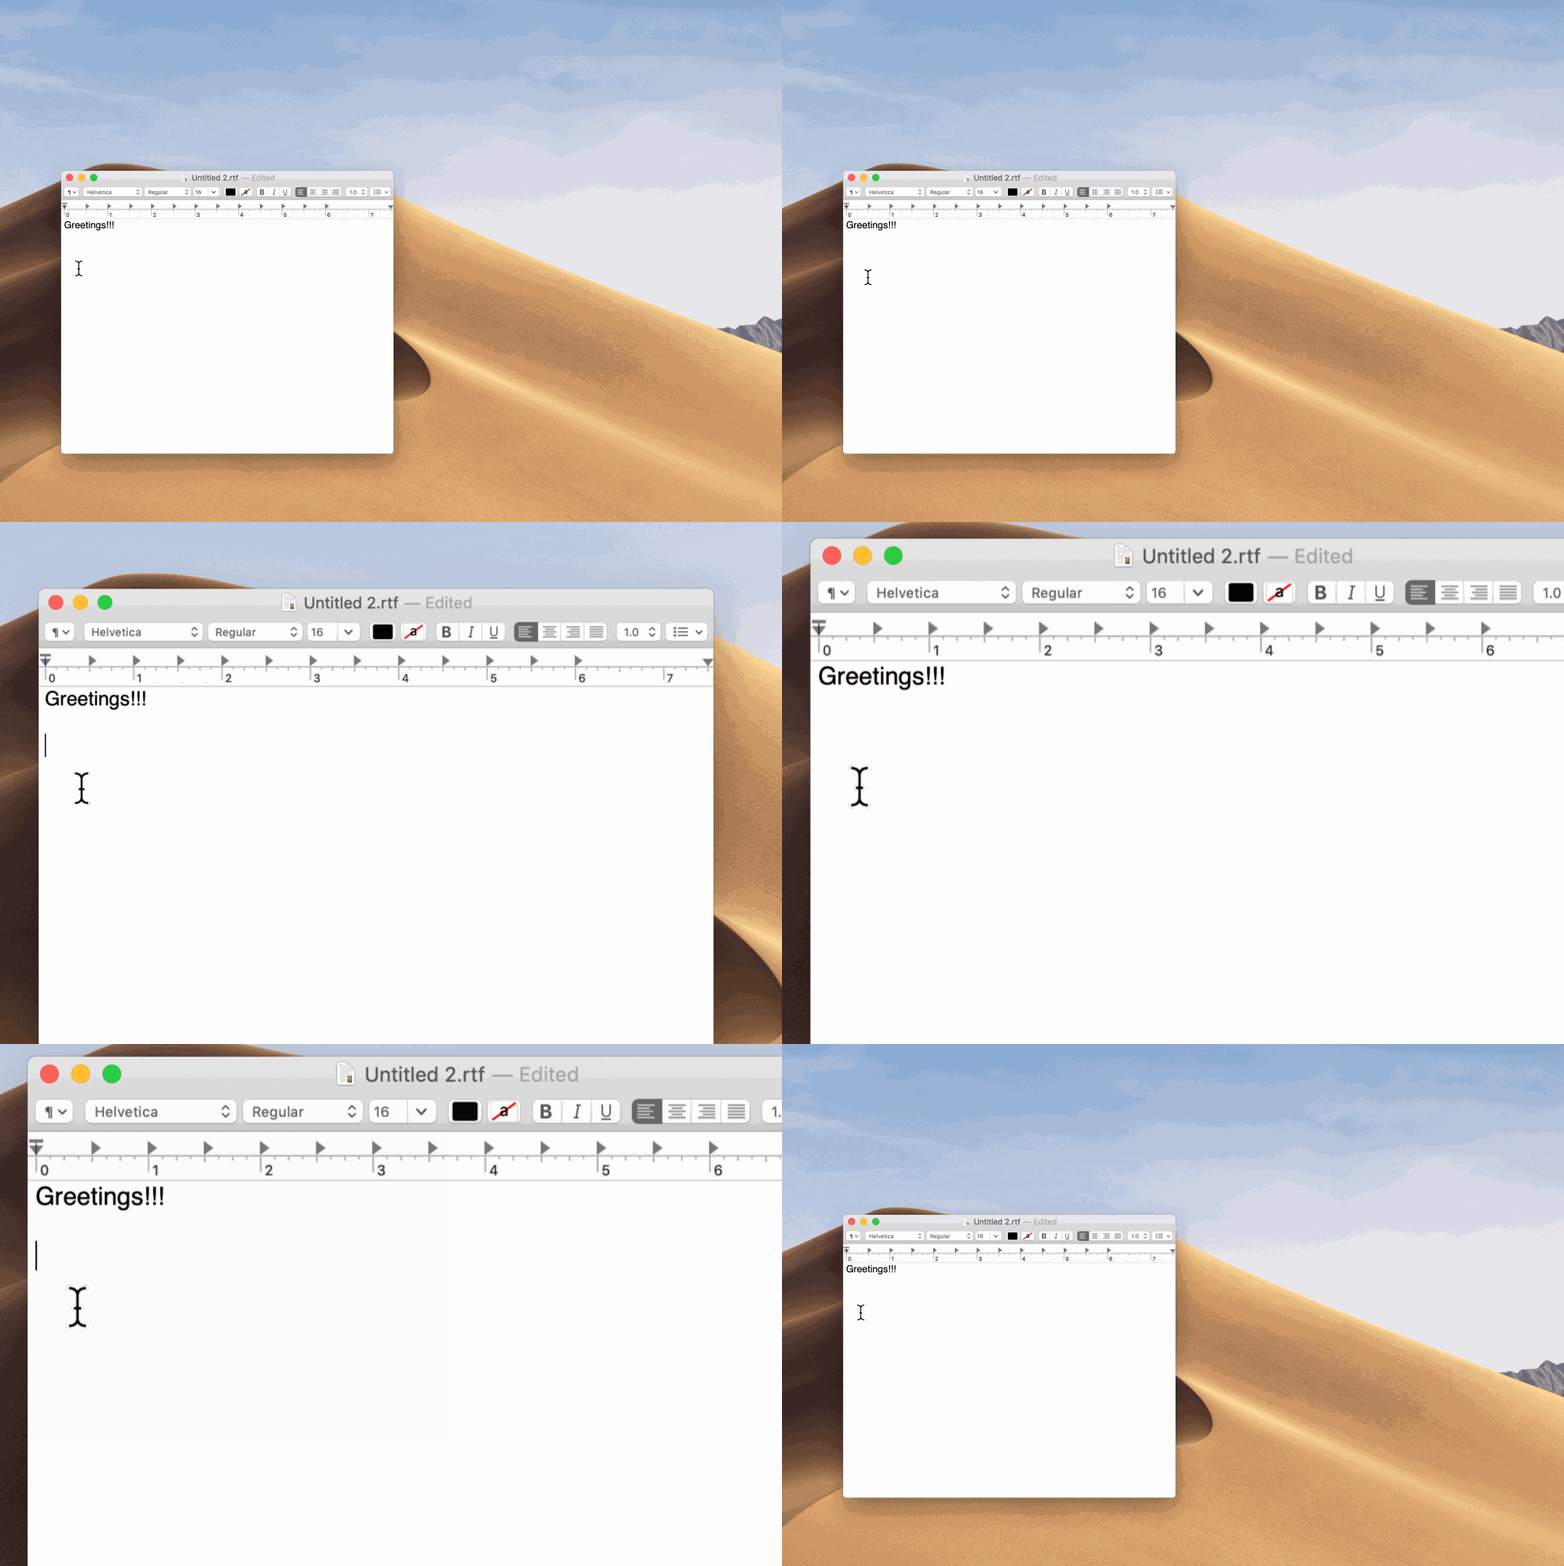
Here we’ve captured part of the screen in this video. As you can see this is what happens when you zoom in or zoom out. To do this, you’ll need to hold down the <strong>control</strong> key, while sliding two fingers up or down on the trackpad.
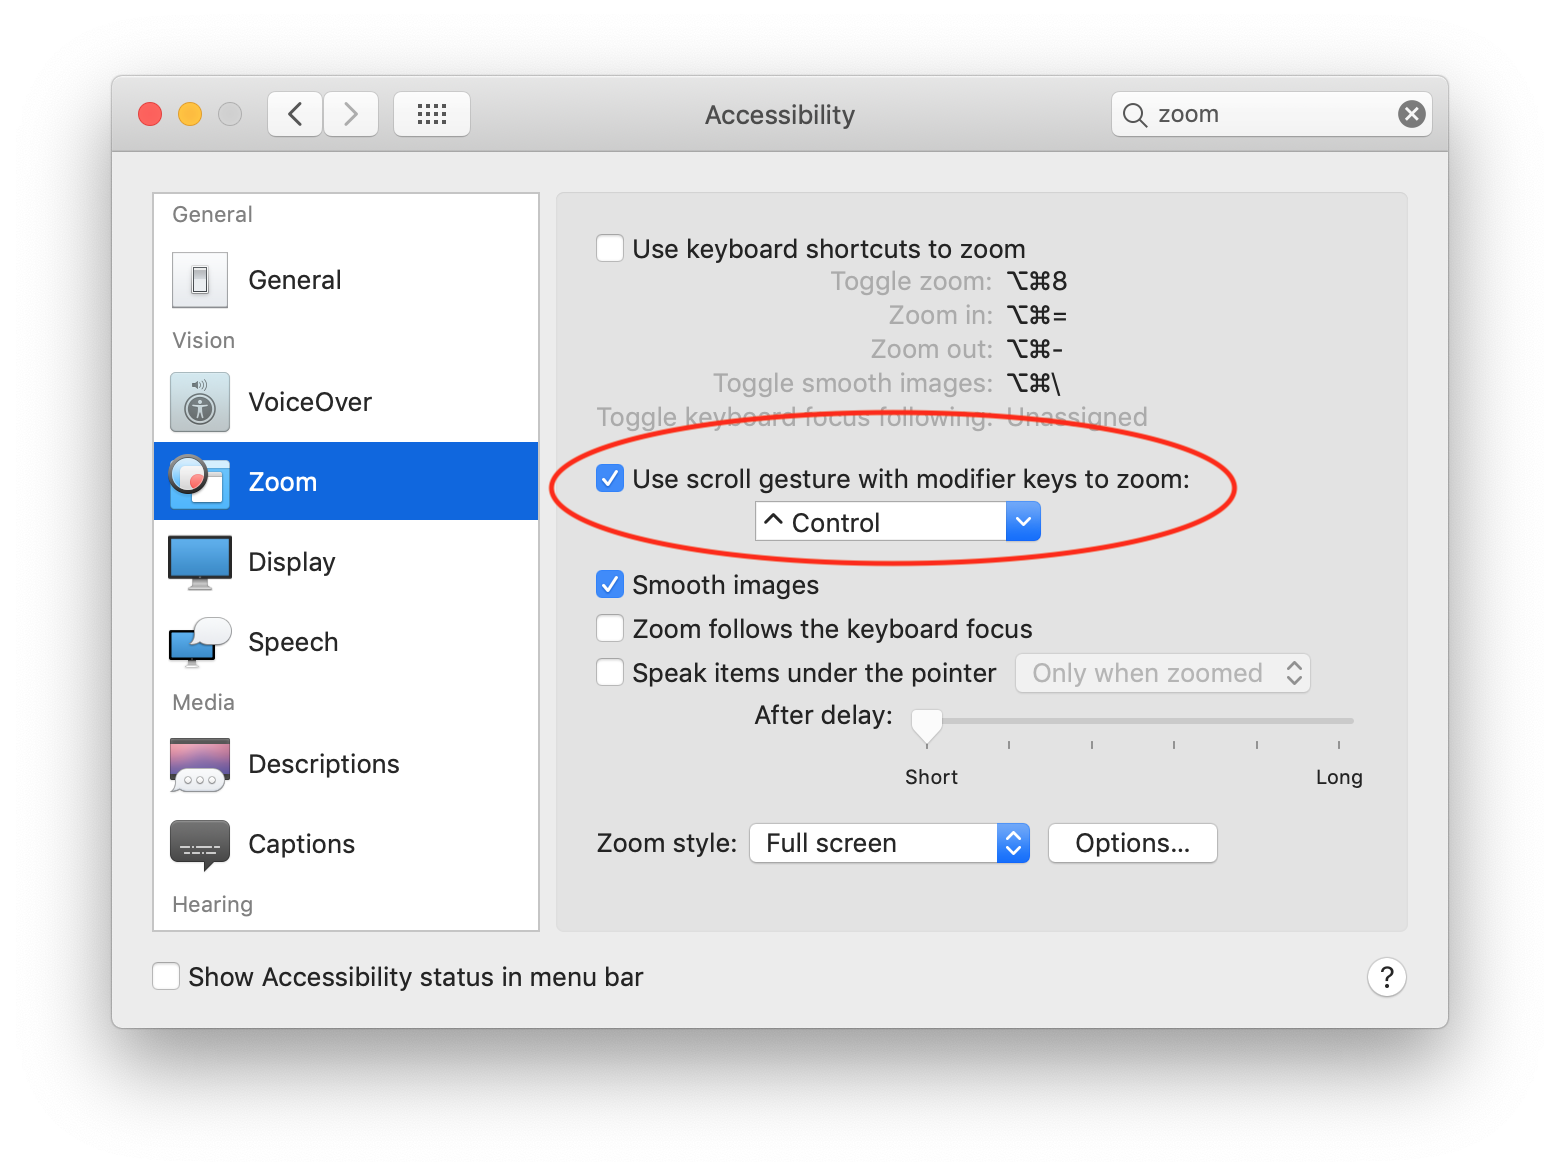
Let’s enable zooming. Open <strong>System Preferences</strong>, then <strong>Accessibility</strong>. On the left, select <strong>Zoom</strong>. Enable <strong>Use scroll gesture with modifier keys to zoom</strong>.
Finder: Path Bar
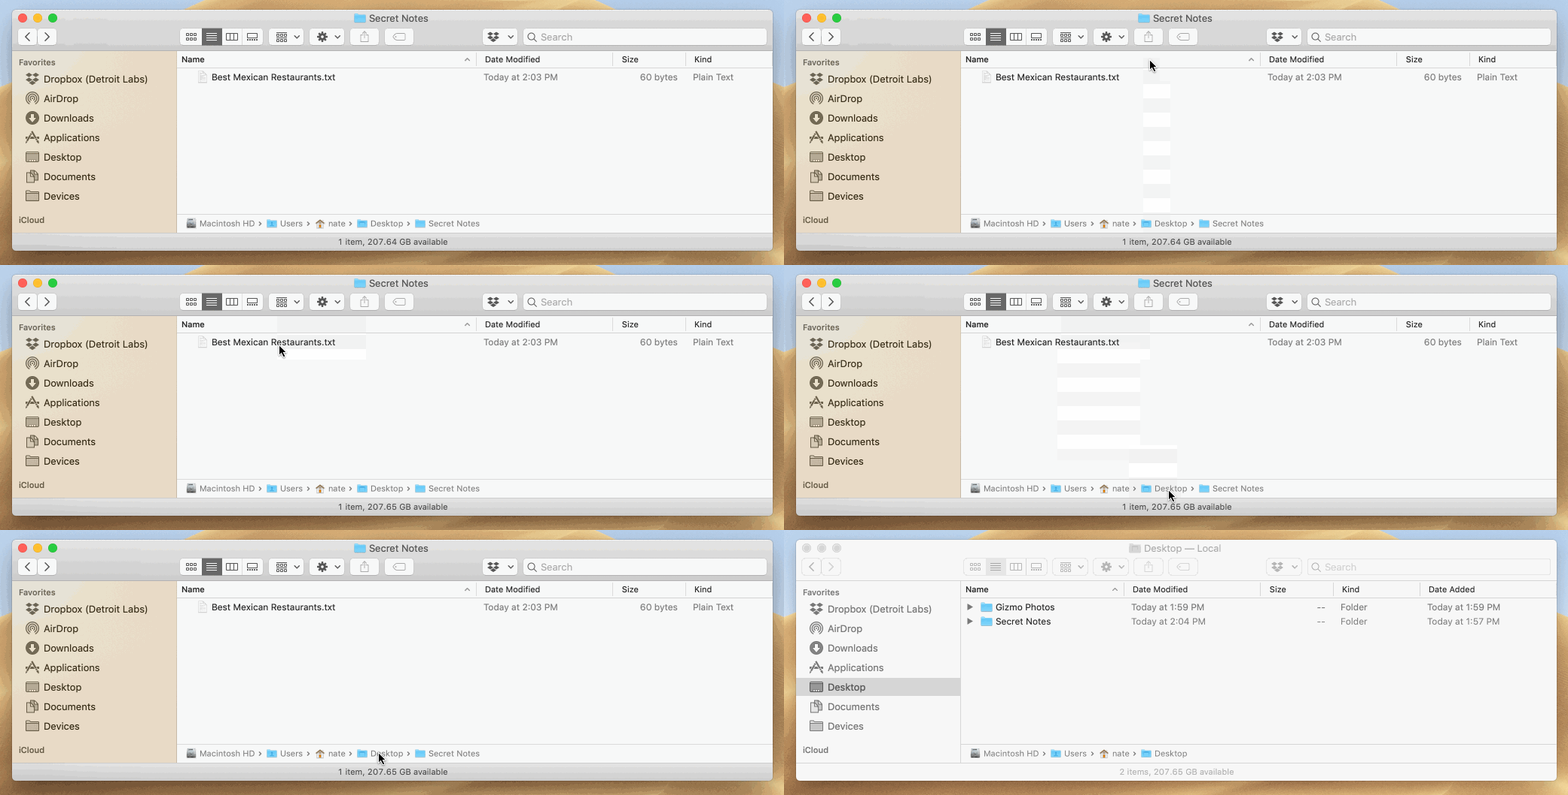
We often find ourselves needing to navigate up one or more folders. By enabling the path bar at the bottom of the finder windows, you can simply double tap on a folder and it will jump there.
You can show the path bar by enabling it under Finder’s view menu.
Here you can see that we’re currently in the <strong>Secret Notes</strong> folder and double tap on the <strong>Desktop</strong> folder to quickly navigate folders.
Xcode: Move Source Code Up/Down
Use the <strong>command+option+[</strong> to move the current line of code up one line. Or <strong>command+option+]</strong> to move the current line of code down one line. This also works for multiple lines of code by highlighting a few lines of code first.
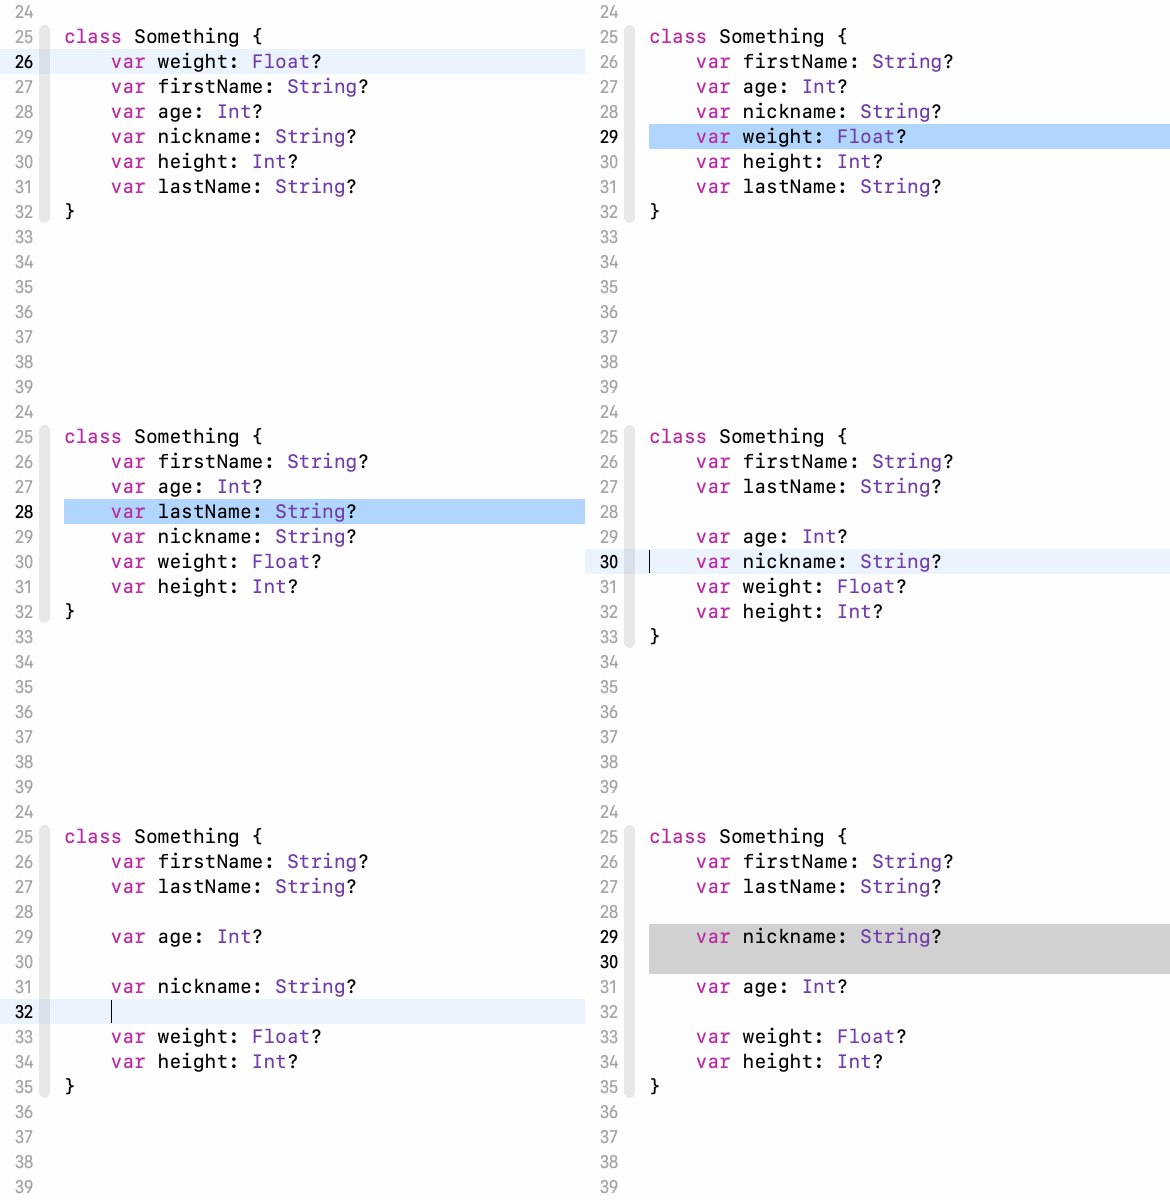
Here you can see that we’re able to quickly and easily group variables together. No copy and paste required.
Xcode: Run/Stop
The battery life of the MacBook is amazing. That is, until you try running an app on an iOS simulator. To extend the battery life, we’ll stop the app once we return to Xcode to do some more programming.
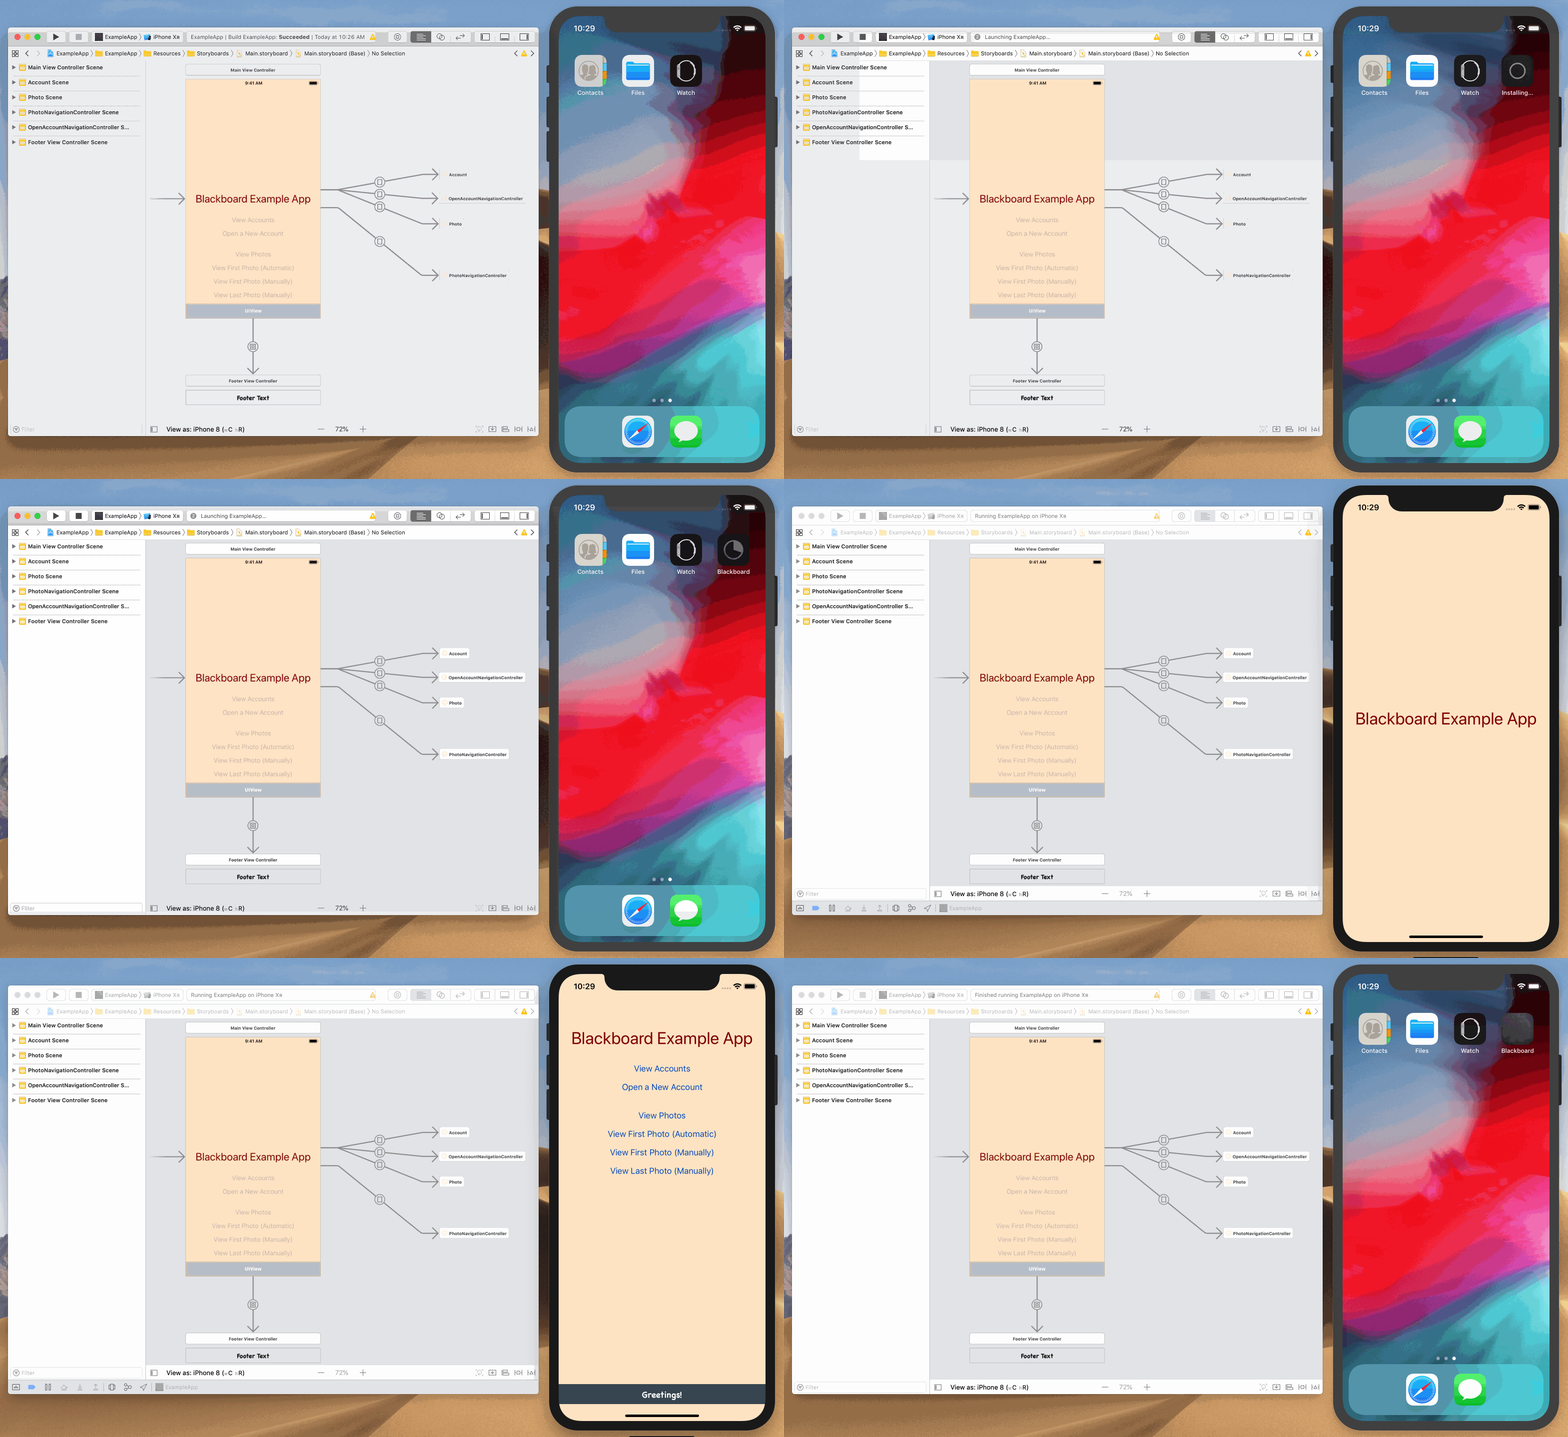
Here you can see, after we’ve launched the App, we switch back to the Xcode editor. You can either press the square button in the upper left to stop the simulator, or press the <strong>Command+</strong>. button keys. Personally, we favor the keyboard shortcut.
Text Editors: Copy / Paste and Match Style
When you copy and paste content, it uses both the text and the styling. Most of the time this is the behavior that you want.
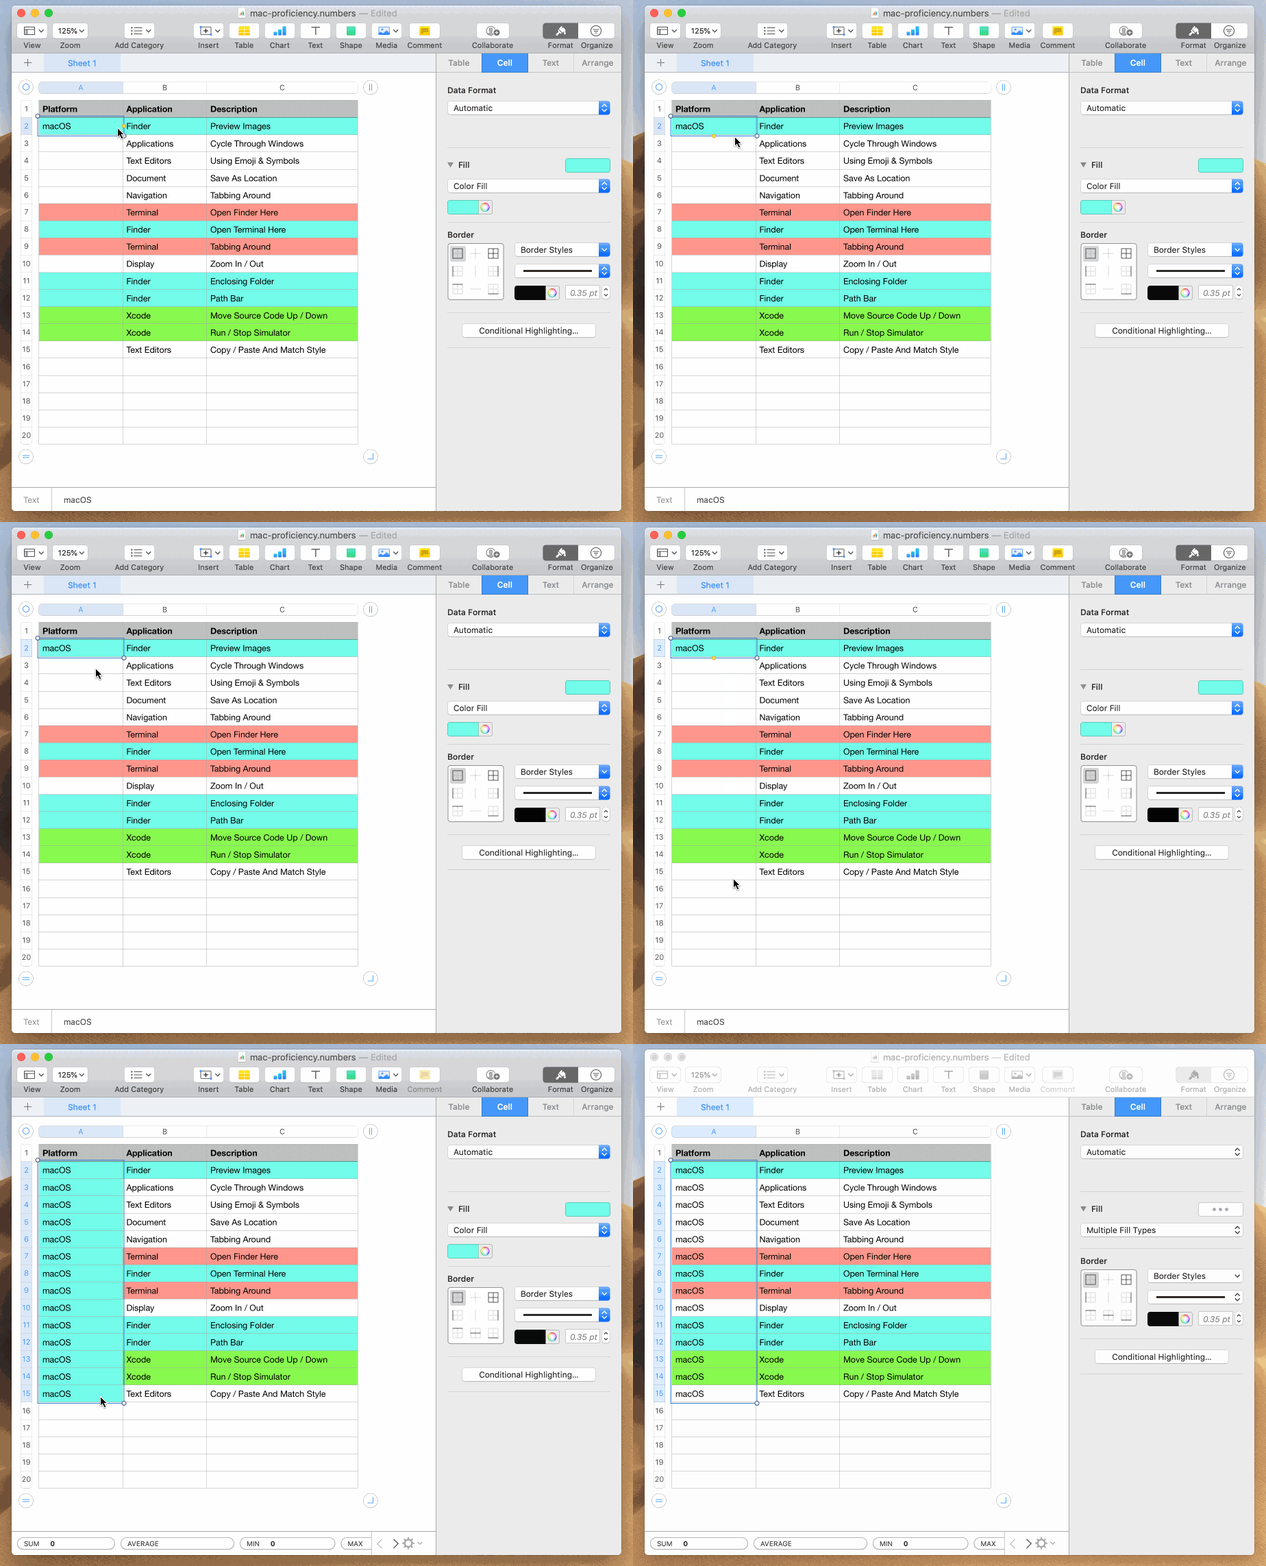
Here you can see that some rows are highlighted different colors. We just added a new column to capture the platform, this could be for macOS, iOS, or Android. These initial entries are all for the macOS. You’ll see that when we try to paste macOS to all of these, it pastes a blue background color. We’d like to keep the existing styling. Let’s try that again. This time we’ll paste using <strong>Shift+Option+Command+V</strong> keys. Just the text was pasted, and the styling was left alone. Perfect!
Finder: Expand All Subfolders
You can manually expand a folder. And then expand a nested folder, and another, and another. There is a shortcut you can use to expand all folders in a single click.
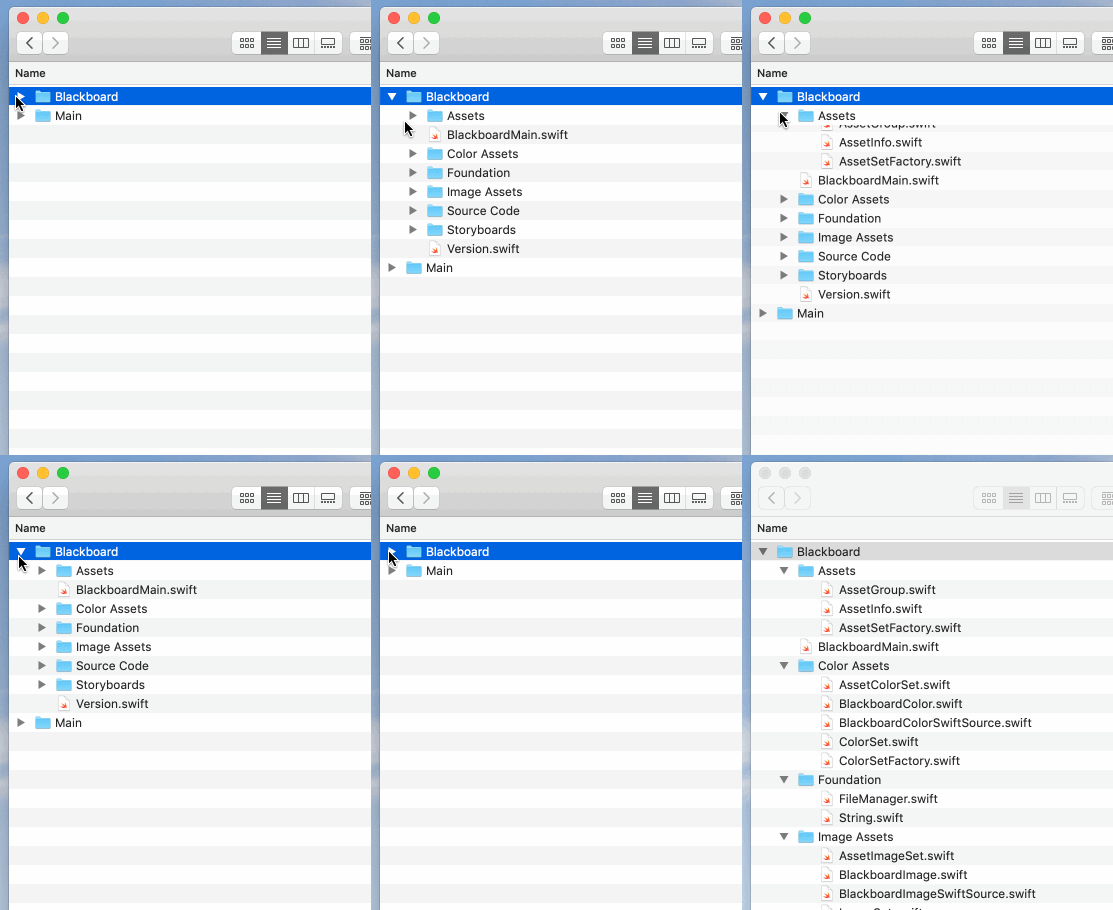
Here you can see that a few folders were manually expanded and collapsed. If you hold down the <strong>Option</strong> key while you click the expand arrow, it will traverse down all nested folders, and open them all up. This also works in reverse if you want to collapse all nested folders.
This also works in Xcode!
Finder: New Folder with Selection
It takes some discipline to keep your files organized. Finder can help. If you have a few files selected, it offers you the option to create a new folder and move them into it.
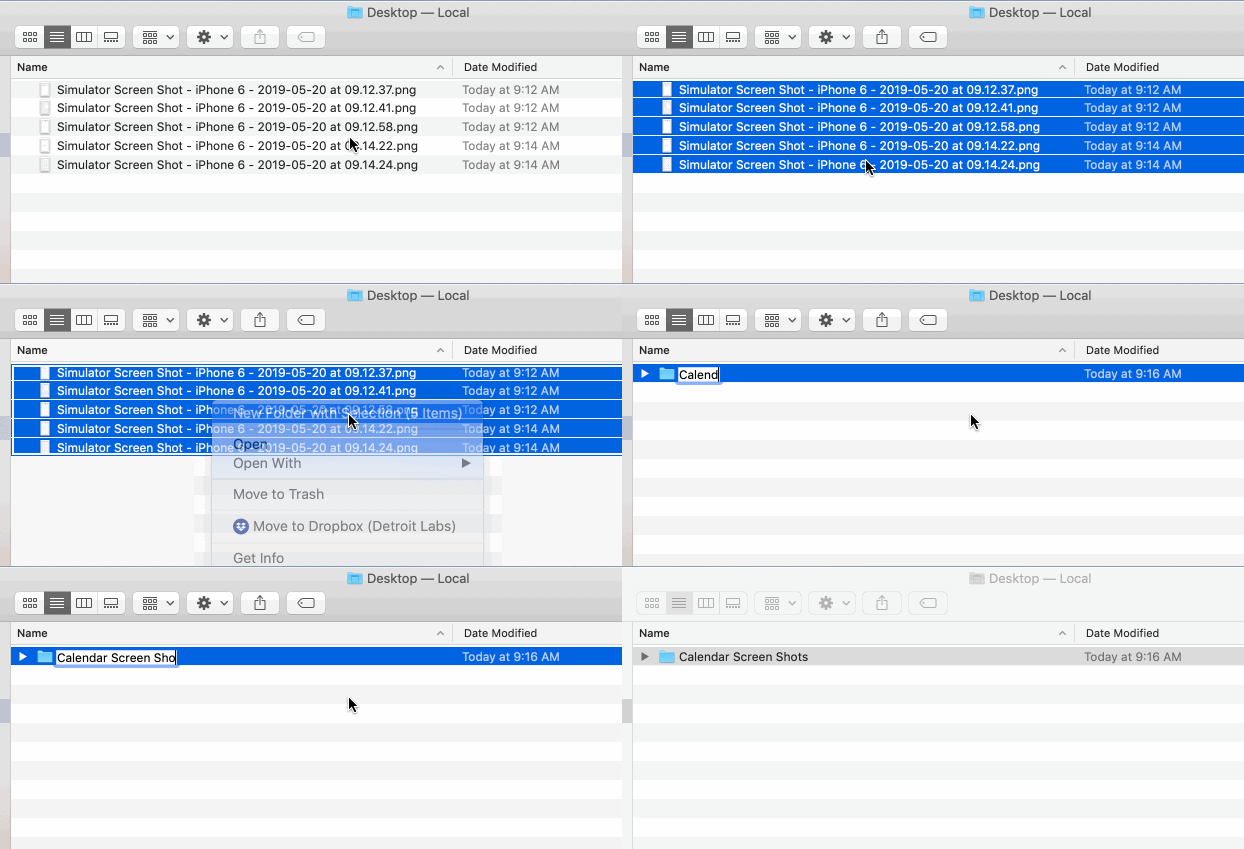
Here you can see that we’ve selected all five images. Right-click on them and select <strong>New Folder with Selection</strong>. This creates a new folder and moves all selected files inside. It also prompts you to name the new folder.
Finder: Rename Multiple Files
It takes some discipline to keep your files organized. Finder can help. Let’s say you have recently taken several screen shots. These names might not be very useful.
Here you can see that we’ve selected all five images. Right click on them and select <strong>Rename Items</strong>. This will prompt you with several options. We’ve chosen to rename these files with a shared base name of <strong>calendar-screen-shot-</strong> and a sequential suffix starting at 4.

What about you?
What are the Mac shortcuts you can’t live without?
We’ll keep updating this post so keep checking back for updates. The most updated Mac shortcuts will always be at the top of the page.

