While recently working on a project that relies heavily on Charles Proxy to run multiple parts of our web app, there was a need to test on a variety of devices that our developers and QA team may not have access to (*cough* Internet Explorer *cough*).
Our team went ahead and set up accounts for BrowserStack, but realized that we wouldn’t have a way to utilize Charles while using the out-of-the-box BrowserStack. This was a problem, as many of the scenarios that needed to be tested could only be done through Charles. After a bit of searching through BrowserStack’s documentation, cue Local Testing: “Local Testing establishes a secure connection between your machine and BrowserStack servers. Once you set up Local Testing, all URLs work out of the box, including those with HTTPS, multiple domains, as well as those behind a proxy (hey, like Charles!) or firewall, and much more.”
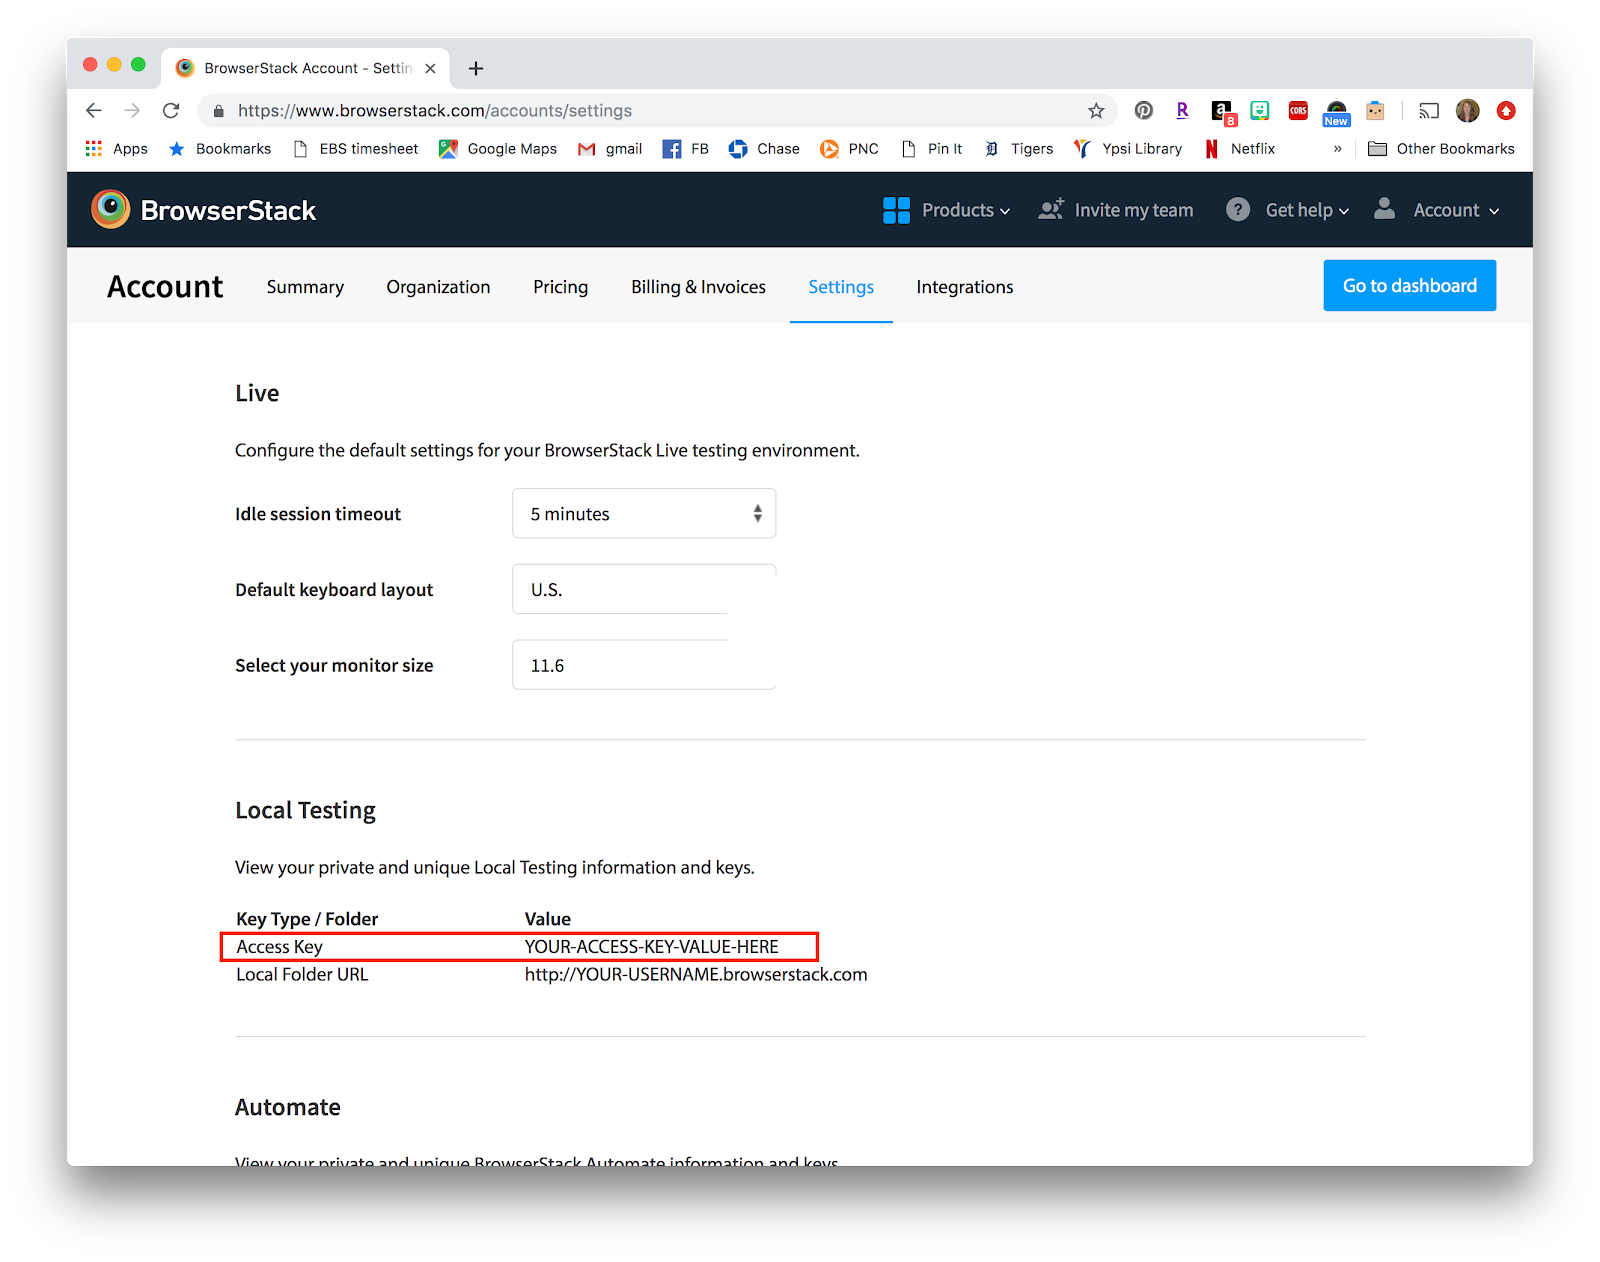
While there are extensions for Chrome and Firefox, we quickly realized that these don’t offer enough configuration to allow this to be configured correctly. So, we moved on to the Local Testing Binary option (for our use case, we used the one for OS X). This requires that you know your access key, which you can obtain by logging in to your BrowserStack account and navigating to the settings page:

Then, navigate to the folder that you placed your binary in (or your downloads folder, if you didn’t move it), open up Terminal from that folder, and run this command:
./BrowserStackLocal --key [access-key-goes-here] --force-proxy --proxy-host 127.0.0.1 --proxy-port 8888 --force-local
The Breakdown
Before moving on, let’s break down what’s happening in that command. We’ll skip the beginning
./BrowserStackLocal --key [access-key-goes-here]
and move on to the next part:
--force-proxy.
If we look at the documentation at BrowserStack’s local testing page: “This option routes all traffic via the proxy specified – otherwise, binary tries to connect directly as well for better performance.” This is essentially saying that it will force all traffic through a proxy (in our case, Charles).
Again looking at the documentation for the next part:
--proxy-host 127.0.0.1
It says: “If you are behind corporate proxy setup, please specify your proxy host using this option.” Ignore the “corporate” part, but as we’re trying to use Charles as our proxy, this gives us a chance to specify where our Charles proxy server is located — our computer. We can do that by using the IP loopback address for our own computer, 127.0.0.1 (not to be confused with your private IP, which is the address that lets you communicate with other network devices. Read more on loopback addresses).
Continuing on:
--proxy-port 8888
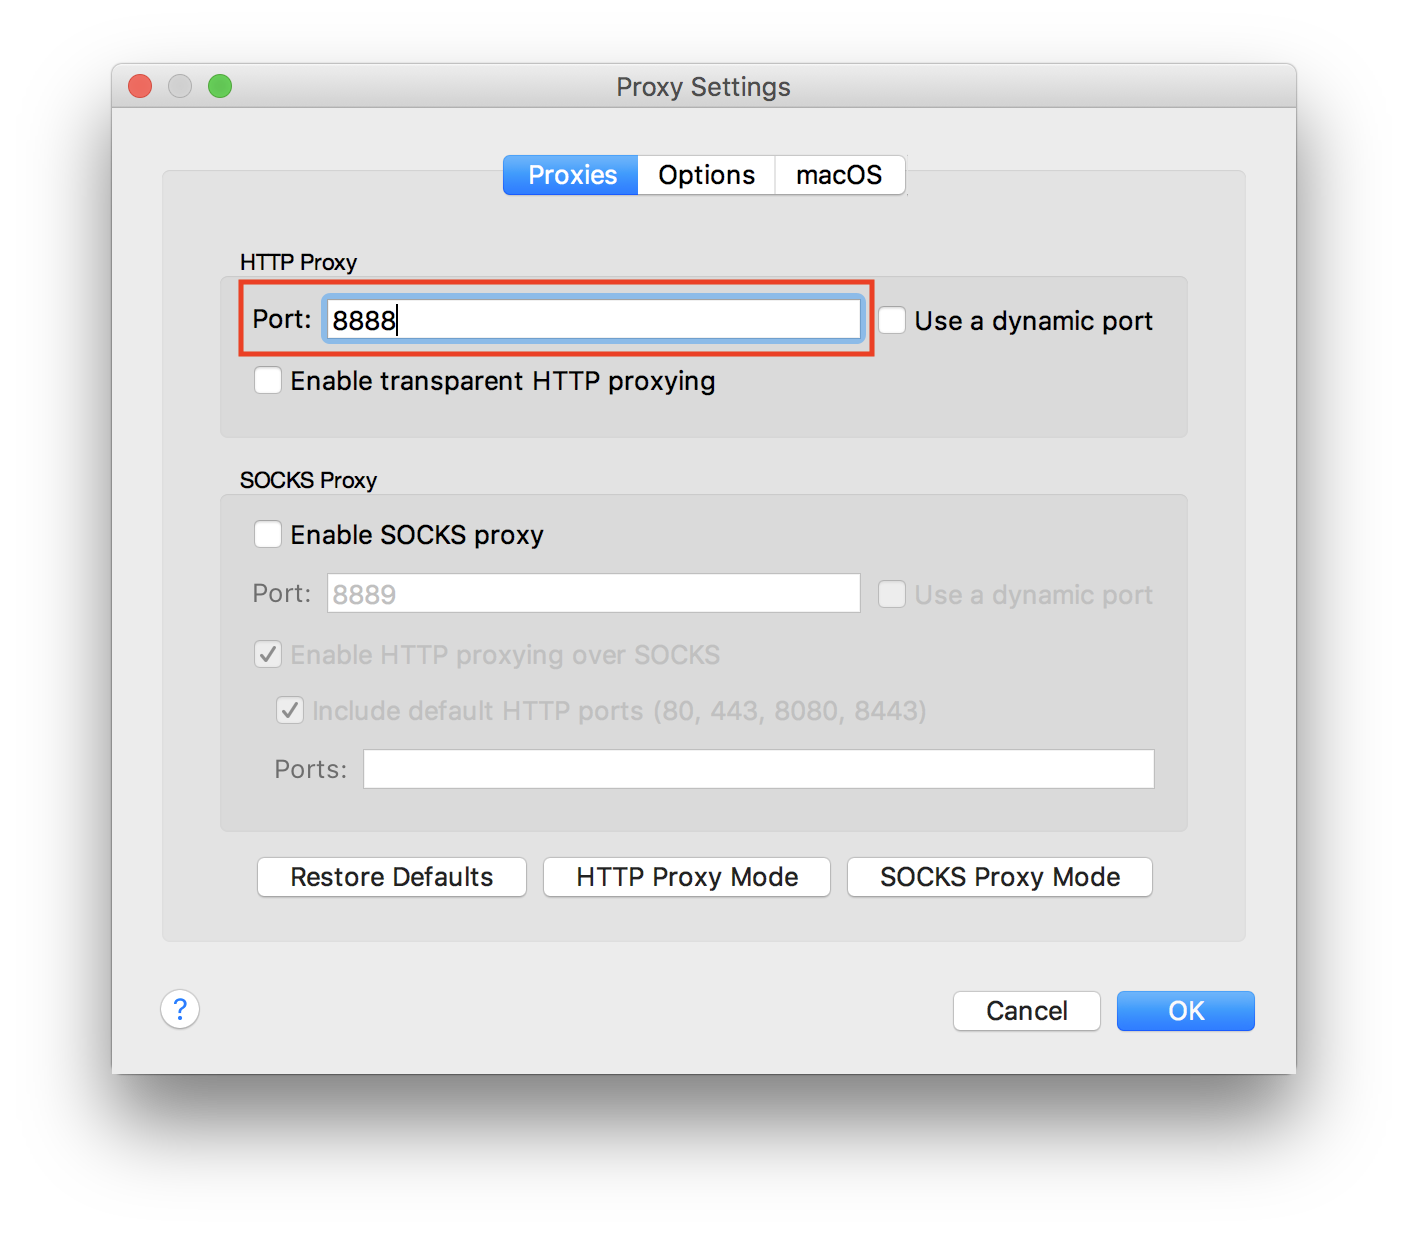
And the supporting documentation: “If you are behind corporate proxy setup, please specify your proxy port using this option.” Because we are trying to go through a proxy, we need to use the port specified in our proxy settings. To identify what port Charles was set up on, navigate to Proxy > Proxy Settings:

As you can see, in this instance, Charles was set up to use 8888.
And finally, the last part:
force-local
And the supporting documentation: “Route all traffic via machine where BrowserStackLocal Binary is running.” As stated, this simply forces all traffic through your computer.
And there you have it! You should now be set up to successfully run your app through all the browsers and devices you can think of (or that BrowserStack offers 😉) using Charles! Happy testing!
